Are you tired of baking shortbread that turns out dry, crumbly, or just plain disappointing? Many home bakers struggle to achieve that perfect melt-in-your-mouth texture and rich buttery flavor that makes shortbread so irresistible. It can be frustrating when your efforts don’t match the delicious treats you find in bakeries or remember from childhood.
Imagine serving shortbread that’s more like a hockey puck than a delicate cookie. Or worse, presenting a batch that lacks that signature buttery taste. These setbacks can make you feel like you’re missing some secret ingredient or technique that professional bakers know.
But here’s the good news: with the right tips and tricks, you can master the art of baking the perfect, buttery shortbread right in your own kitchen. This guide will walk you through the essential steps to create shortbread that’s flaky, and utterly delicious. From choosing the right ingredients to mastering the perfect baking technique, you’ll learn how to overcome common shortbread challenges and achieve bakery-quality results. Get ready to elevate your baking game and delight your family and friends with every batch!
Table of Contents
The Golden Ratio: Perfecting the 1:2:3 Formula
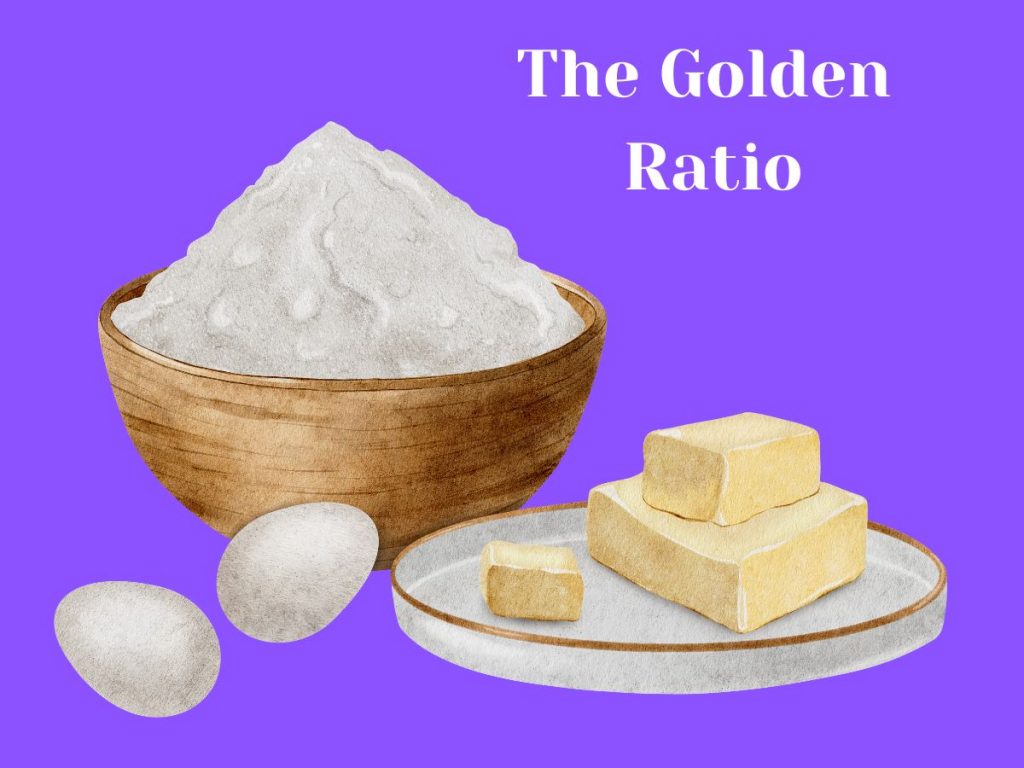
The secret to perfect shortbread lies in the simple 1:2:3 ratio. This means using 1 part sugar, 2 parts butter, and 3 parts flour, all measured by weight. For example, you might use 115 grams of sugar, 230 grams of butter, and 345 grams of flour 4,5. This ratio creates the ideal balance of sweetness, richness, and texture that makes shortbread so irresistible.
Following this ratio is key to achieving the classic shortbread taste and texture. The high amount of butter compared to sugar and flour gives shortbread its signature richness and crumbly texture. The lower sugar content allows the buttery flavor to shine through without being overly sweet.
While you can adjust the flavors by adding extras like vanilla, citrus zest, or even chocolate chips, sticking to this basic ratio ensures your shortbread will have the right consistency. Remember, precision is important in baking, so using a kitchen scale to measure your ingredients by weight will give you the most consistent results 4.
Choosing the Right Butter: The Key to Richness

The quality of butter you use can make or break your shortbread. Since butter is the star ingredient, it’s worth splurging on high-quality unsalted butter. Look for butter with a high fat content, as this will give your shortbread a richer flavor and better texture 1,3.
Most recipes call for softened butter at room temperature. This allows the butter to cream easily with the sugar, creating a light and fluffy base for your shortbread. Take your butter out of the fridge about 30 minutes before you plan to start baking 1. If you forget, you can cut the cold butter into small cubes to help it soften faster.
Some bakers prefer to use cold butter and rub it into the flour for a more traditional method. This can create a more crumbly texture, but it may also result in a rougher surface on your shortbread 2. Experiment with both methods to see which you prefer. Whichever method you choose, remember that the butter’s quality and temperature play a crucial role in achieving that melt-in-your-mouth texture shortbread is known for.
Mixing Techniques: Achieving the Ideal Crumb

The way you mix your shortbread dough can greatly affect its final texture. The most common method is the creaming method, where you beat softened butter and sugar together until light and fluffy. This helps to incorporate air into the dough, resulting in a lighter texture 1,2.
After creaming the butter and sugar, add the flour gradually. Mix until the dough looks crumbly but still holds together when squeezed 1,3. Be careful not to overmix, as this can lead to tough shortbread. The dough should look like coarse sand or breadcrumbs 7.
If you prefer a more traditional, very crumbly shortbread, you can use the rubbing method. This involves rubbing cold butter into the flour and sugar with your fingertips or using a food processor 2. While this method can produce a more crumbly texture, it may also result in a rougher surface on your shortbread. Whichever method you choose, remember that shortbread dough should never be smooth like cookie dough – a crumbly texture is key to achieving that perfect melt-in-your-mouth shortbread.
Shaping and Scoring: Crafting Beautiful Shortbread

Shaping and scoring are essential steps to creating shortbread that looks as good as it tastes. For a classic approach, press the dough into a lined tin and score it into wedges or rectangles before baking. Scoring lightly with a knife or fork ensures even baking and makes it easier to break into clean pieces once cooled. If you prefer individual cookies, roll the dough out to about 1 cm thick and use a round or fluted cutter for a traditional look 4,5.
Scoring isn’t just about aesthetics; it also prevents bubbling during baking by allowing steam to escape. For a decorative touch, use fork tines to create patterns or cookie stamps for intricate designs. If you’re using the slab method, rescore the lines while the shortbread is still warm from the oven. This ensures crisp edges without crumbling 4.
When shaping, handle the dough gently to avoid overworking it, which can make the shortbread tough. Whether you choose traditional wedges or creative shapes, these techniques will help you craft shortbread that’s both beautiful and delicious 5,7.
Baking Tips: Getting the Perfect Texture and Color
Baking shortbread to perfection requires careful attention to temperature and timing. A low oven temperature, around 150°C, is ideal for achieving that signature pale golden color without overbaking. Shortbread should be only lightly browned at the edges while remaining pale on top. Overbaking can result in a dry, crumbly texture instead of the tender crumb you want 2,5.
To ensure even baking, place your tray in the center of the oven and avoid overcrowding it with too many cookies at once. Rotate the tray halfway through baking if your oven has hot spots. For slabs of shortbread pressed into tins, bake at a slightly lower temperature for longer to maintain an even texture throughout 4,5.
Once baked, let your shortbread cool completely before removing it from the tin or breaking it into pieces. Cooling allows it to firm up and develop its characteristic texture. For an extra touch of sweetness, sprinkle caster sugar over the surface while it’s still warm from the oven 2,4.
Flavor Enhancements: Creative Add-Ins for Variety

Shortbread’s simple base makes it a perfect canvas for endless flavor combinations. Citrus zest, such as orange or lemon, adds brightness—rub the zest into sugar before creaming to release maximum flavor. Herbs like rosemary or lavender provide subtle aromatic notes, while spices like cinnamon or cardamom add warmth 1,3.
For a sweet twist, mix in dried fruits like cranberries or candied orange peel. Nuts such as almonds or pistachios add crunch and richness. Tea lovers can experiment with crushed Earl Grey or chamomile leaves for unique flavors. Extracts like vanilla, almond, or peppermint can also elevate your shortbread—just remember that a little goes a long way 1,3.
Savory variations are equally delightful. Try adding finely grated Parmesan cheese or chopped fresh herbs for a more robust flavor profile. Whether sweet or savory, these creative add-ins allow you to customize your shortbread to suit any occasion 1,6.
Troubleshooting Shortbread: Fixing Common Issues
Shortbread can be tricky, and common problems like spreading, uneven baking, or a greasy texture can ruin the final result. If your shortbread spreads too much during baking, the dough might be too soft or warm. To fix this, chill the dough for at least 30 minutes before baking, as this helps the butter stay firm and prevents spreading 1,3. Using cold butter during preparation also ensures the dough holds its shape better 1.
If your shortbread turns out greasy or crumbly, it’s likely due to an imbalance in ingredients. Too much butter or too little flour can lead to a greasy texture, while overmixing the dough can make it crumbly 3,5. Always measure ingredients accurately and mix just until the dough comes together. For uneven baking or burnt bottoms, check your oven temperature with a thermometer to ensure accuracy and bake on the center rack for even heat distribution 1,5. These small adjustments can make a big difference in achieving perfect shortbread.
Storage and Serving: Keeping Your Shortbread Fresh

Proper storage is key to maintaining shortbread’s buttery flavor and delicate texture. To keep baked shortbread fresh, store it in an airtight container at room temperature for up to 10 days 2,6. For longer storage, you can freeze baked shortbread by layering it in a rigid airtight container with parchment paper between layers. It will keep in the freezer for up to three months 6.
If you prefer to prepare ahead of time, shortbread dough can also be frozen. Wrap it tightly in plastic wrap and store it in a freezer-safe container for up to three months. When ready to bake, thaw the dough overnight in the refrigerator before rolling and cutting shapes 2. Whether baked or frozen, always allow shortbread to come to room temperature before serving for the best flavor and texture 6,8.
Conclusion
Go on and put what you have learned from this post to use and create some unbelievably buttery shortbread. These new found strategies are meant to help you be even more creative in the kitchen. Try out your new skills with all the delicious variations!
Should you need additional advice or insights, please contact me at info@ayoogidan.com. I’m here to support your baking success.
Frequently Asked Questions:
Q: What is the golden rule?
A: Use the 1:2:3 ratio of sugar, butter, and flour for a perfect dough
Q: Does my butter need to be softened?
A: Soften butter for a creamy dough
Q: Is it OK to mix my dough a lot?
A: Don’t overmix!
Q: How can I get creative in my mixes?
A: Use zest for a citrus blast.
Q: Should my raw dough be refrigerated?
A: Chill before baking to stop spread
Q: What temp do I set my oven to?
A: Bake at low heat 300°F (150°C).
Q: I want mine to look beautiful, how do I do that?
A: Use a fork to vent
Q: Is there a limit to how many I can bake on the tray?
A: Don’t overcrowd your try and rotate for best results
Q: Can I freeze it?
A: Freeze for long life
Q: How long will it last if stored right?
A: Up to 10 days stored at room temperature and can last up to 3 months stored frozen!